Welcome back,
This will be an informative post on how to change your own oil. Oil changes aren't that expansive to get done at a shop however, there are a number of benefits if you do it yourself. Such as using synthetic oil for the same price as the regular oil or synthetic blend the shop would put in. (if you ask them to use synthetic expect to pay x3 more at the shop). Not to mention the peace of mind that it was done right. I've heard some horror stories like mechanics overfilling oil or not tightening the drain plug down.
Let me clarify why it's very bad if one puts too much oil in. Once the car is started, the excess oil wont have anywhere to go while under pressure except out through seals and gaskets.
*I won't be doing this with you as it's about 15
°F
outside but I'll walk you through it*
Back to the oil change:
First consult the owners manual for how much oil to use.
I have the U.S. 2.5L model so it's recommended by the manufacturer to use 4.2 quarts. I mentioned earlier that you can get better quality supplies for about the same cost as having it done with lower quality supplies at a shop. Once you get to the auto parts store you may want to ask for recommendations on what to use. I use a brand called "Eneos" full synthetic 5w30, it works wonders for turbo-charged vehicles and about $50 for 5 quarts. If you're driving a Subaru like me, I recommend using an OEM filter which you can get from the dealership for about $10, be sure to get a crush washer as well (pictured below). If you decide to get a filter from the auto parts store, don't forget to ask for a crush washer.
Why is this crush washer important you ask? It will prevent oil from seeping through the threads of your oil drain plug and onto your driveway. I'll explain more further down.
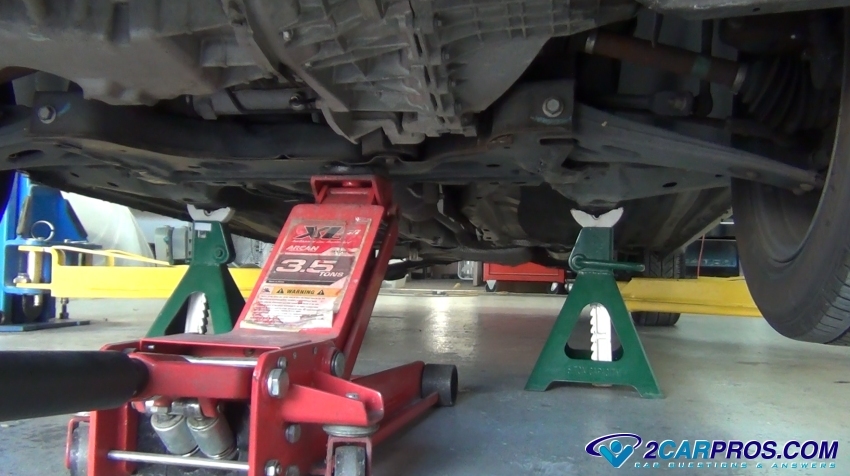
Once you have the required tools and supplies, you'll want to jack up your car or drive it onto ramps (pictured) so you can access the undercarriage easily.
It might be easier if this is your first time to drive up onto ramps than deal with a floor jack and jack stands. If you decide to use ramps DRIVE SLOWLY up onto them. It can be easy to give it too much gas and drive right off the ramp. Just go slow and you'll be fine.
If you decide to use a jack, remember to use jack stands on a sturdy location like a pinch weld or the frame rails. DO NOT throw them under the car haphazardly.
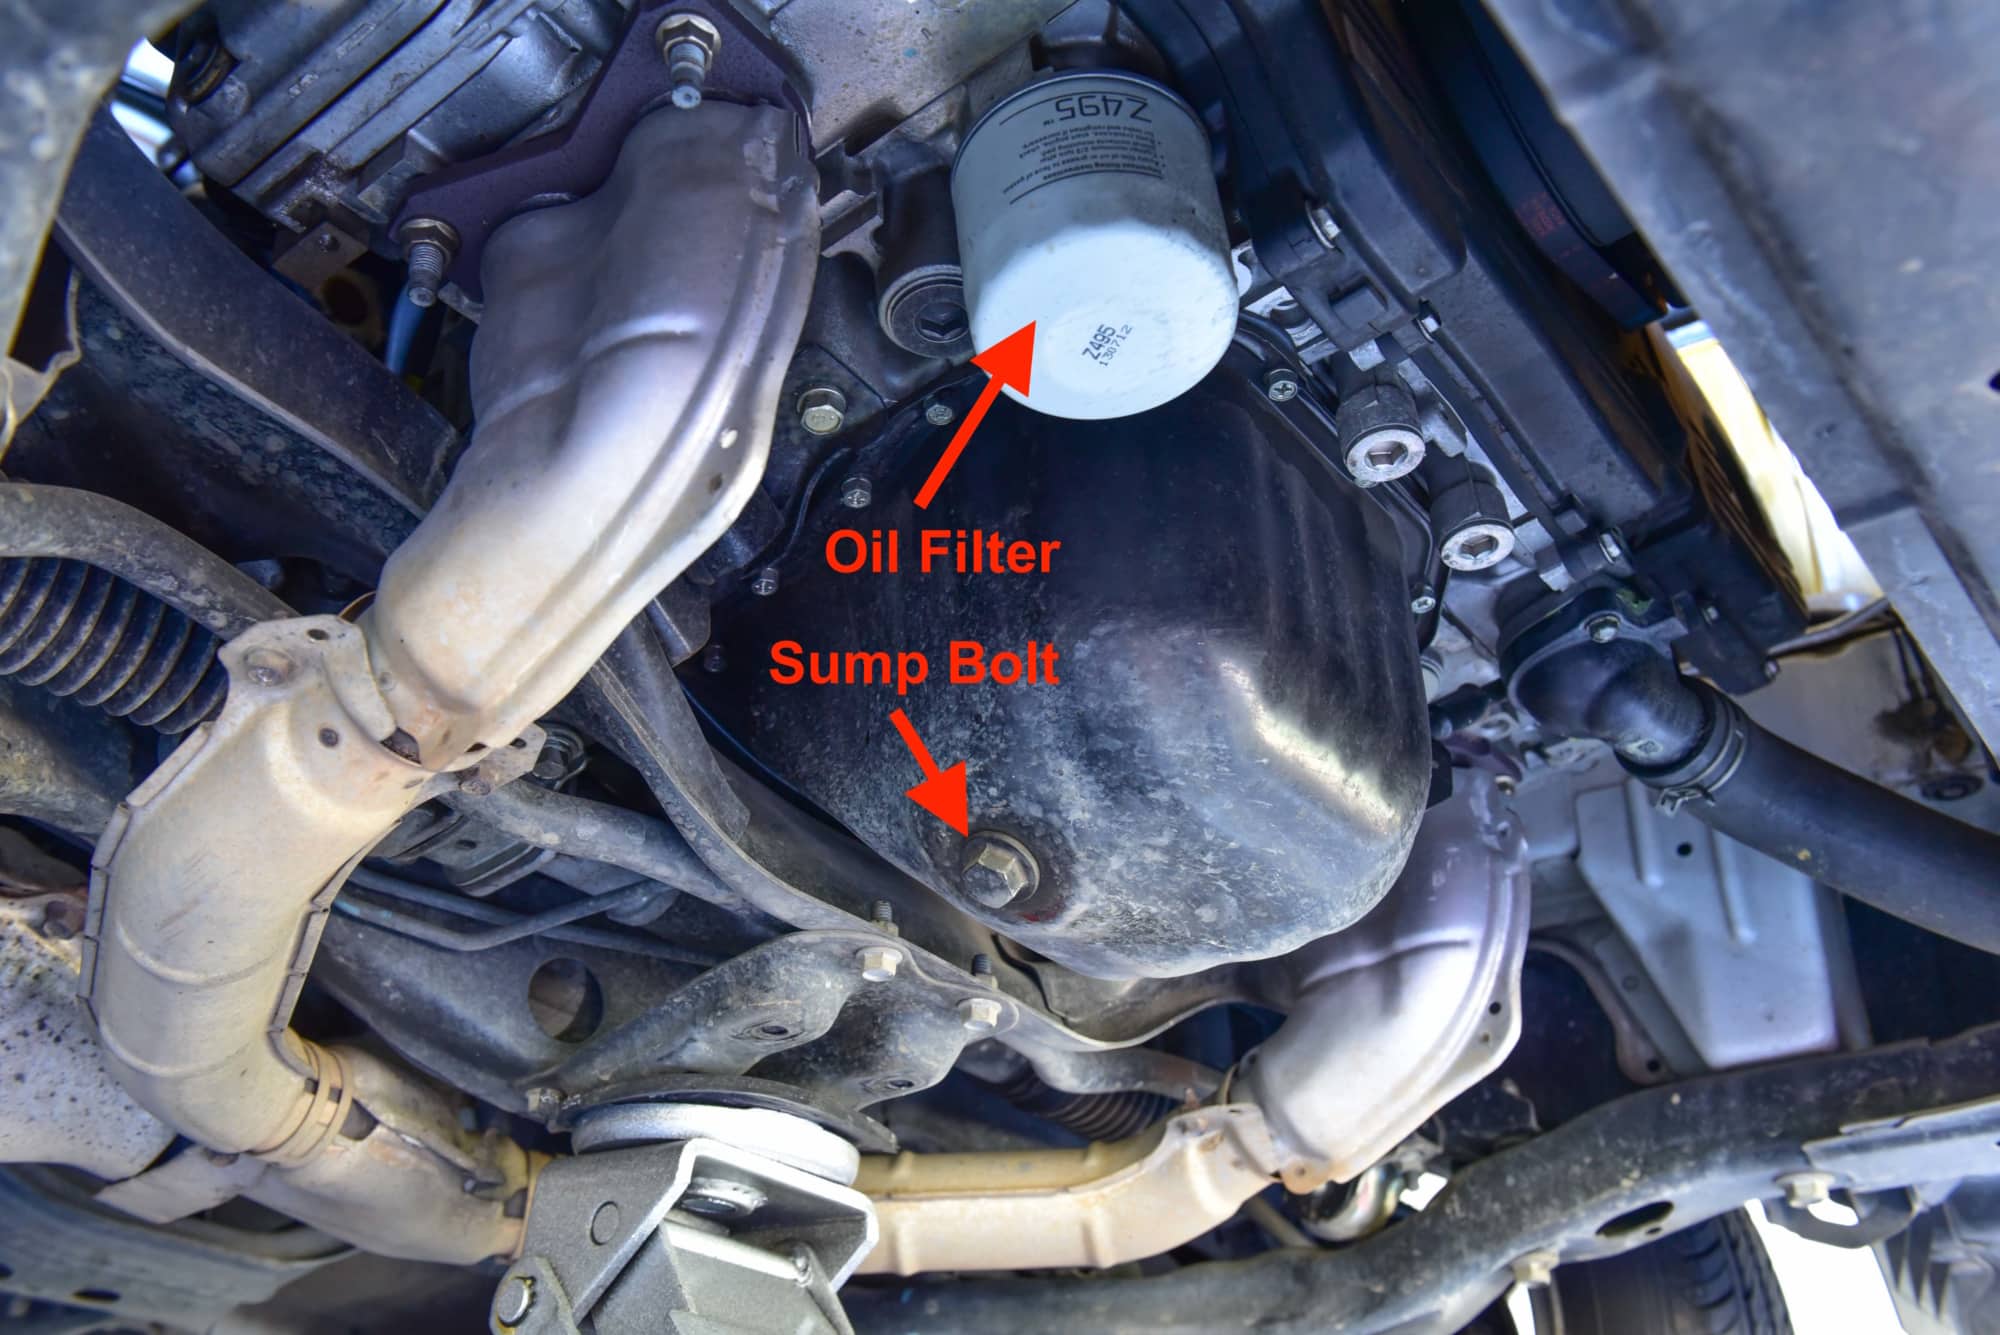
Unscrew the oil fill cap from your engine to depressurize the system. In the picture below, the oil filter is conveniently located next to where we'll add oil later.

The oil filter will most likely be located below the engine
Have an oil drain pan ready. I would surround the base of the drain pan with cardboard, just in case any oil splashes out. And it will get messy so have rags on hand. Also don't dress in nice clothes.
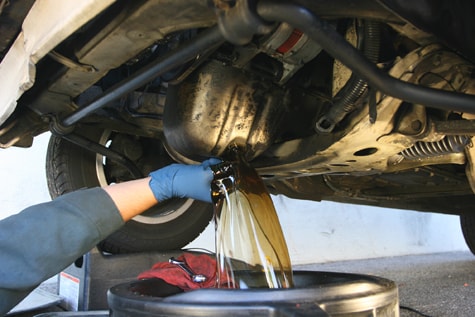
Select the appropriate socket for the drain plug. Most Subarus use a 17mm, make sure its a snug fit before you start wrenching. Oil will splash to release the drain plug slowly, wear gloves, and just be out of the way of the oil flow. (see picture). Unscrew the oil filter, whip down soiled areas, screw the drain plug back in, then replace the filter with a new one.
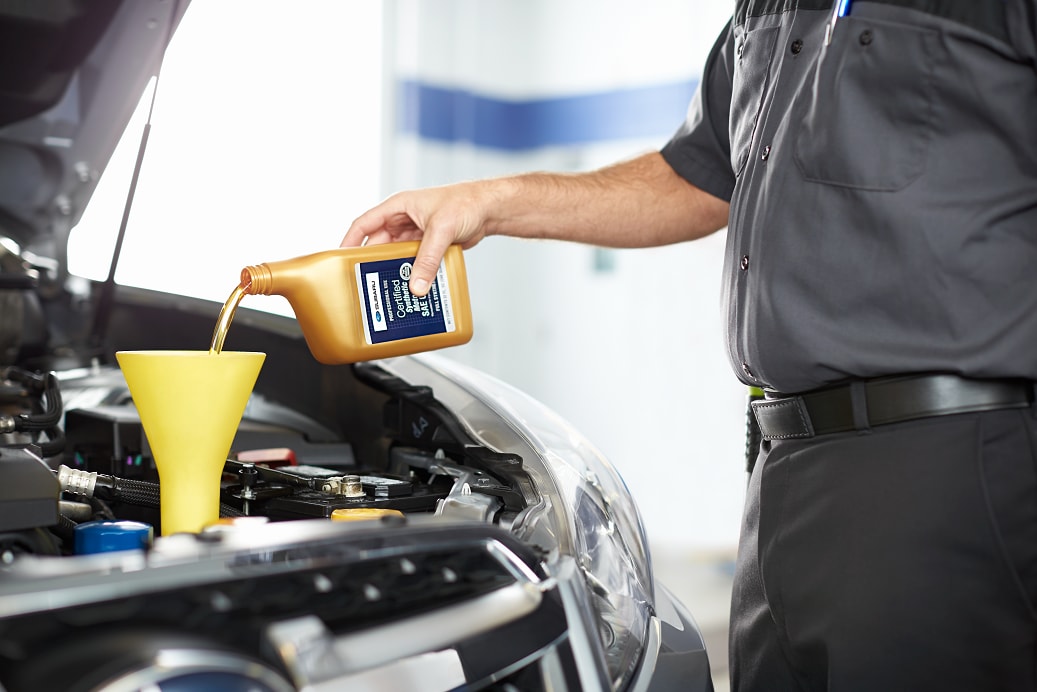
No matter what car you're preforming this on, this information still applies to you. Notice how this technician is pouring this quart of oil. By doing so it allows air into the bottle without causing the oil to glug and burp out uncontrollably. Add the correct amount of oil as indicated by the owners manual.
*Optional*
You could start the car up but all the oil I just added is sitting at the bottom of the motor.
This next piece is just my personal preference, it's option for you. Turn the key past "Acc" to the "On" position so that the motor turns over just a few times but it don't let it turn on. Then reset it to the "off" position. If the car starts, turn it off right away and repeat a few times. Remember, you just want the motor to turn over a couple times. This probably sounds weird so far, the idea behind this is in those one or two repeated cranks of the motor, it pumps oil into where it needs to be. If one chooses to start their car right up after the oil change oil will eventually get to where it needs to be.


