Monday, March 5, 2018

Prevent wiper blade damage


Hey everyone,

This is just a tip for those living in the Midwest. As the temperature hovers just above freezing, a slushy snowy mixture just started coming down. I recommend that you pull up your windshield wiper blades to prevent them from getting frozen to the windshield. When you go to your car in the morning to remove the snow, you'll have to pry the blades from the windshield which will cause pre-mature damage to the rubber blades. So pull e'm up before they freeze. Don't be like this person:

Image result for windshield wiper blades frozen to the windshield


I just went outside and took a few pictures:


Wiper blades aren't that expensive to replace but if you're in college or on a budget, why spend the money if you don't have to?

Saturday, March 3, 2018

Prevent rust behind your license plate

Welcome back,

Today I will be discussing my solution to prevent your trunk from rusting behind the license plate. As pictured below, you can see where water and mineral deposits were resting behind this person's license plate. it's hasn't begun to rust yet, but given enough build-up and time, preventable damage can occur. In some cases, there are rubber or plastic inserts that one would screw their plate into, however that doesn't always prevent the license plate from making contact with the trunk. Metal on metal with a water and salt mixture in between is no bueno. I live in the mid-west so salt and rust is an issue for us.

Image result for rust behind the license plate + trunk


The solution is simple. I went to walmart are picked up some rubber bumpers for $2


Some are missing because I've already done the project. Start by removing your license plate and cleaning it. You may also want to clean the trunk lid where the plate was located.


As you can see the build-up behind the plate wasn't entirely eliminated but it was mitigated since the bumpers allowed most of the water behind the plate to drain.


Clean the license plate and apply the bumpers in the desired locations


Re-install


Friday, February 23, 2018

How to remove the pads from Brembo brakes

Hello everyone,

After upgrading the brakes on my Legacy to a used set of Brembos from a 2004 STi, I hear this noise which I can only describe as a metal clap or creak coming from the front left. The noise only happens once as i'm leaving the driveway and engage the brakes. Also it's not a re-occurring noise. Prior to doing research online, I wanted to get a closer look at the caliper and the pads to see if anything was loose or interfering with the brake pad. After removing the pads and ultimately finding nothing, I did the research and it's possible that since the rotors are used, the piston inside the caliper has to travel further to make contact with the pads and then the rotors. Basically, it's possible that when I replace the pads and rotors, the creak will go away.

I got a closer look at the caliper so here it is:

*Remember*
-Put blocks behind the rear tires and pull up the E-brake before jacking up a car
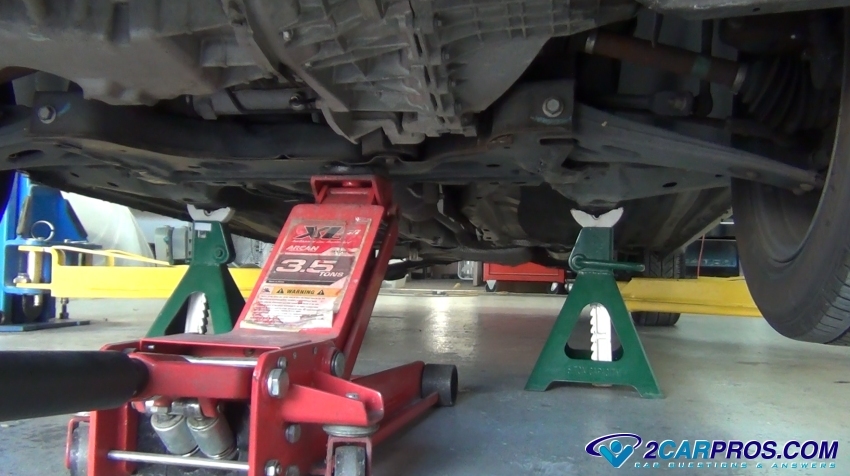
-In the picture, the weight of the vehicle is on the jack-stand and not the floor jack
-Wear gloves and safety glasses

Once you have jacks in place and the wheel off, I used a 16mm wrench socket to remove the bolts holding the caliper in place.


Using a pair of pliers I removed the cotter pins. Since the pins running perpendicular are gunked up with brake dust i used a steel punch and hammer to tap them out. Keep in mind you don't want to use too big of a punch or you could damage the caliper. Be aware that the metal wish bone is under stress so lightly depress the tab as you are removing the perpendicular pins.


Let's take a look at the pads


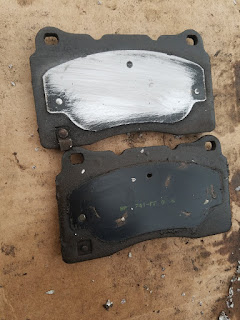
The pads themselves were in good condition. You can see the circles made by the piston in the first picture, all the grease was pushed away from where the piston makes contact. I removed the old grease, sanded the rust away and regreased them. Use ample lubrication. I even sanded the wishbone and applied grease where the pins would slide through.


Now retrace your steps and reassemble.


Wednesday, February 14, 2018

Oil change

Welcome back,

This will be an informative post on how to change your own oil. Oil changes aren't that expansive to get done at a shop however, there are a number of benefits if you do it yourself. Such as using synthetic oil for the same price as the regular oil or synthetic blend the shop would put in. (if you ask them to use synthetic expect to pay x3 more at the shop). Not to mention the peace of mind that it was done right. I've heard some horror stories like mechanics overfilling oil or not tightening the drain plug down.

Let me clarify why it's very bad if one puts too much oil in. Once the car is started, the excess oil wont have anywhere to go while under pressure except out through seals and gaskets.
*I won't be doing this with you as it's about 15°F outside but I'll walk you through it*

Back to the oil change:

First consult the owners manual for how much oil to use.


I have the U.S. 2.5L model so it's recommended by the manufacturer to use 4.2 quarts. I mentioned earlier that you can get better quality supplies for about the same cost as having it done with lower quality supplies at a shop. Once you get to the auto parts store you may want to ask for recommendations on what to use. I use a brand called "Eneos" full synthetic 5w30, it works wonders for turbo-charged vehicles and about $50 for 5 quarts. If you're driving a Subaru like me, I recommend using an OEM filter which you can get from the dealership for about $10, be sure to get a crush washer as well (pictured below). If you decide to get a filter from the auto parts store, don't forget to ask for a crush washer.

   
Why is this crush washer important you ask? It will prevent oil from seeping through the threads of your oil drain plug and onto your driveway. I'll explain more further down.


Once you have the required tools and supplies, you'll want to jack up your car or drive it onto ramps (pictured) so you can access the undercarriage easily.

Image result for car driven up onto ramps

It might be easier if this is your first time to drive up onto ramps than deal with a floor jack and jack stands. If you decide to use ramps DRIVE  SLOWLY up onto them. It can be easy to give it too much gas and drive right off the ramp. Just go slow and you'll be fine.

Image result for car jacked up floor jack jack stands

If you decide to use a jack, remember to use jack stands on a sturdy location like a pinch weld or the frame rails. DO NOT throw them under the car haphazardly.

                             Image result for pinch weld


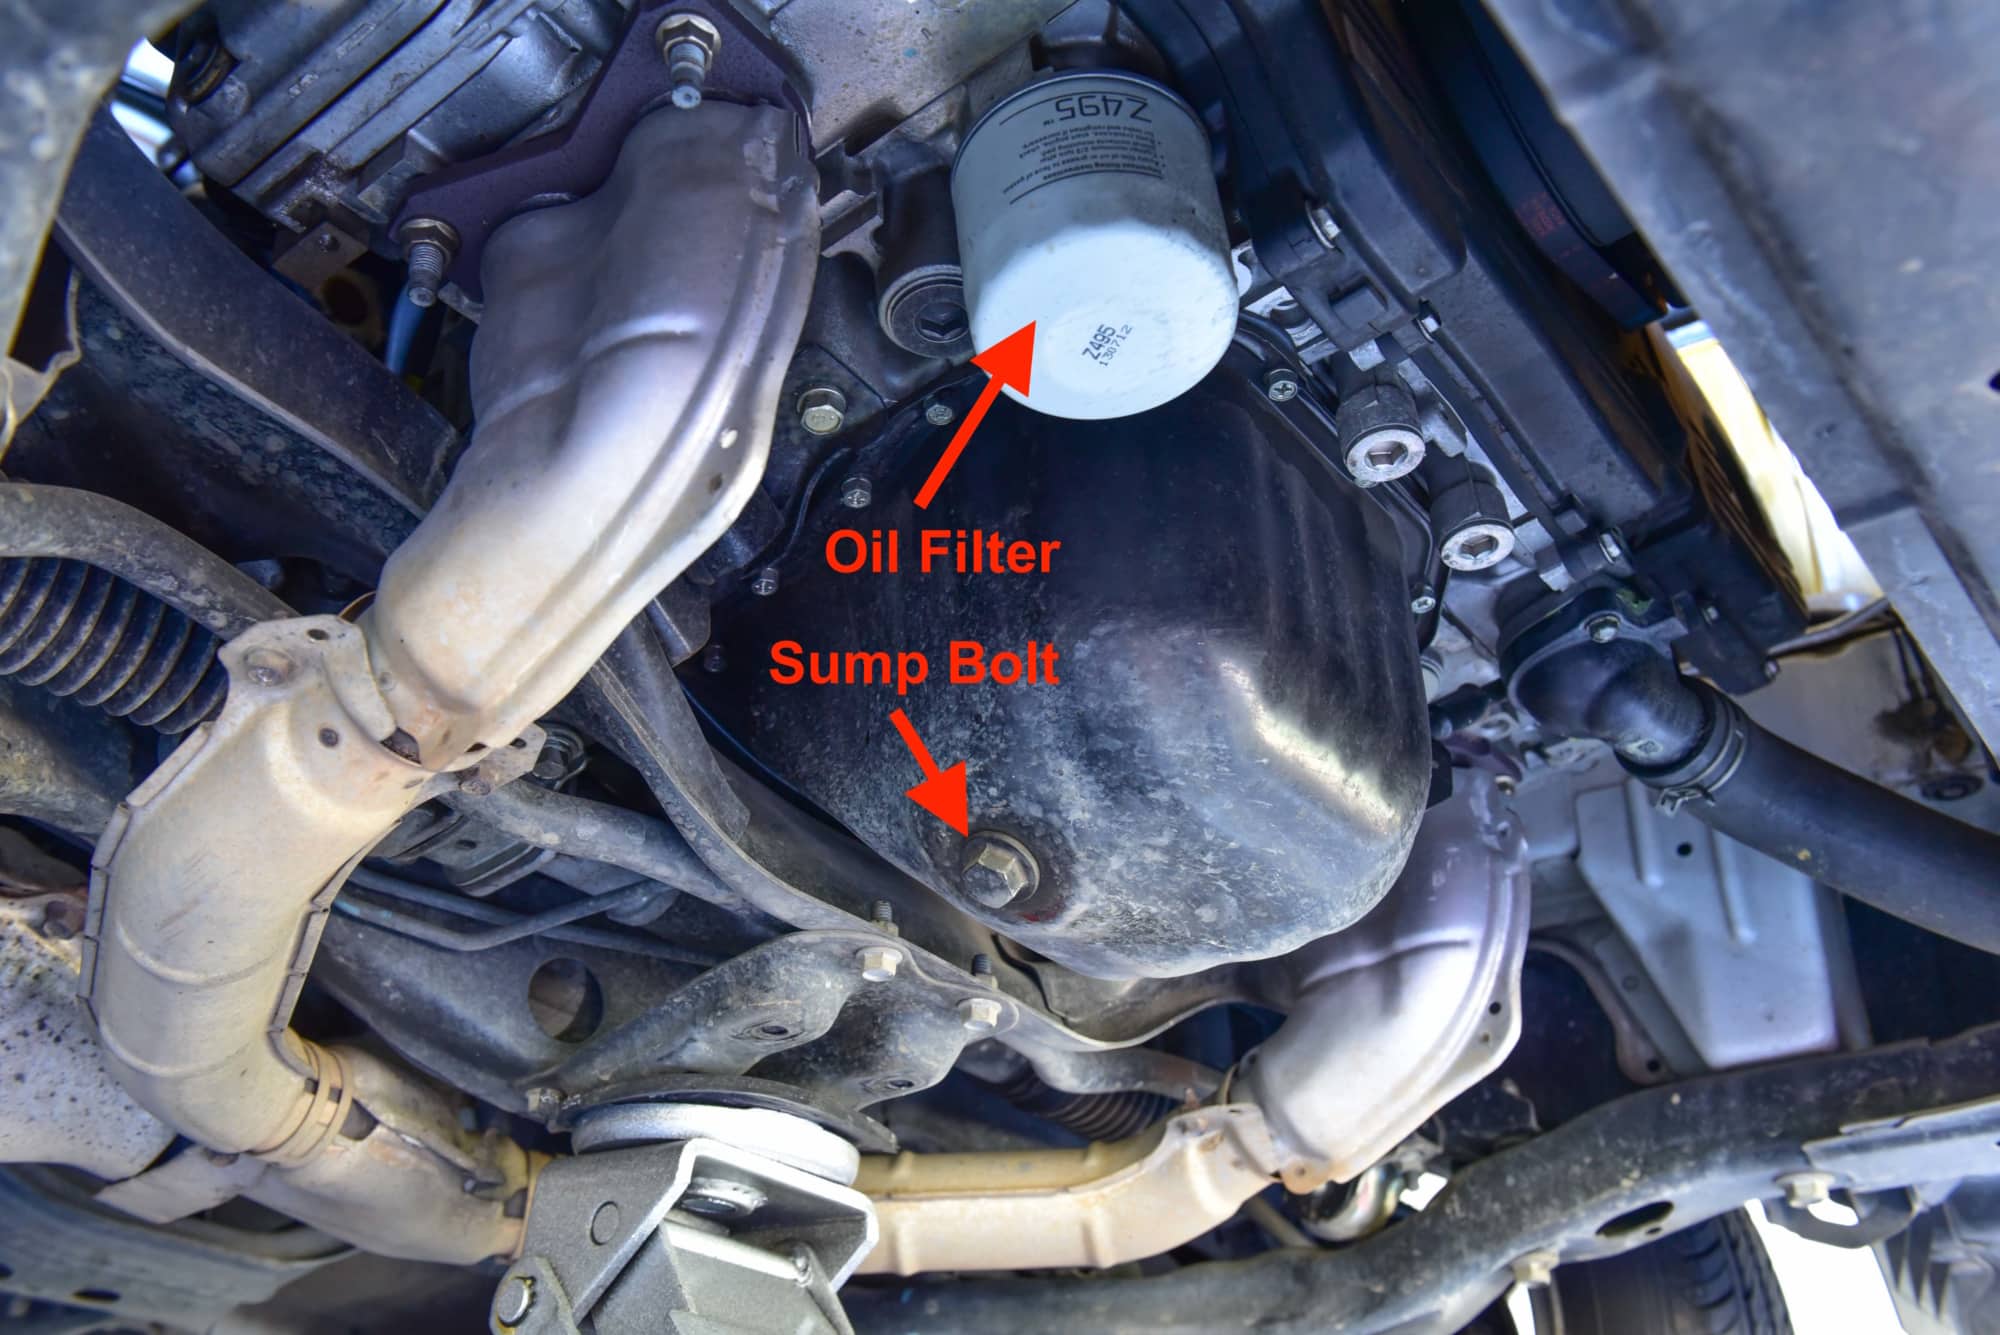
Unscrew the oil fill cap from your engine to depressurize the system. In the picture below, the oil filter is conveniently located next to where we'll add oil later. 

                               Image result for subaru oil change

The oil filter will most likely be located below the engine

Image result for subaru oil change
Have an oil drain pan ready. I would surround the base of the drain pan with cardboard, just in case any oil splashes out. And it will get messy so have rags on hand. Also don't dress in nice clothes.


Image result for subaru oil change

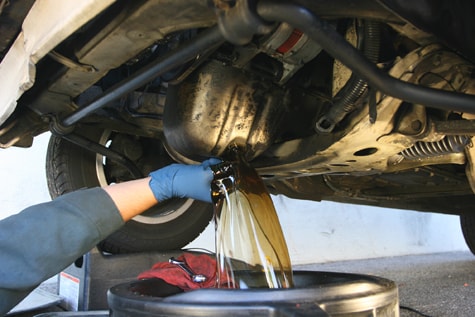
Select the appropriate socket for the drain plug. Most Subarus use a 17mm, make sure its a snug fit before you start wrenching. Oil will splash to release the drain plug slowly, wear gloves, and just be out of the way of the oil flow. (see picture). Unscrew the oil filter, whip down soiled areas, screw the drain plug back in, then replace the filter with a new one.
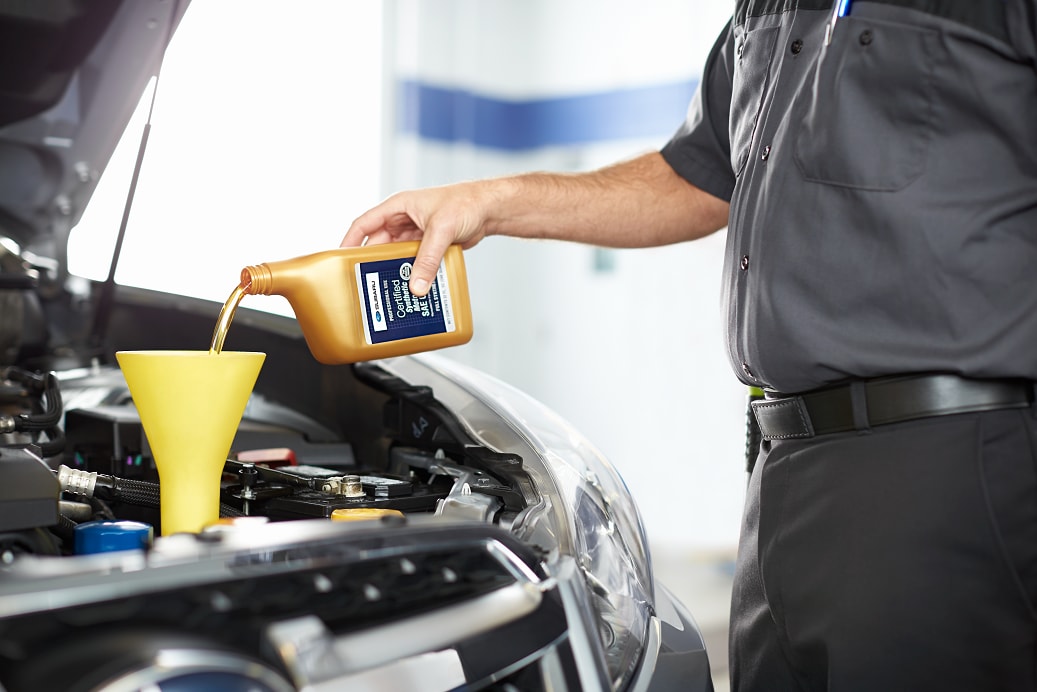

                                Image result for subaru oil change pouring oil

No matter what car you're preforming this on, this information still applies to you. Notice how this technician is pouring this quart of oil. By doing so it allows air into the bottle without causing the oil to glug and burp out uncontrollably. Add the correct amount of oil as indicated by the owners manual. 


*Optional*
You could start the car up but all the oil I just added is sitting at the bottom of the motor. 
This next piece is just my personal preference, it's option for you. Turn the key past "Acc" to the "On" position so that the motor turns over just a few times but it don't let it turn on. Then reset it to the "off" position. If the car starts, turn it off right away and repeat a few times. Remember, you just want the motor to turn over a couple times. This probably sounds weird so far, the idea behind this is in those one or two repeated cranks of the motor, it pumps oil into where it needs to be. If one chooses to start their car right up after the oil change oil will eventually get to where it needs to be.                                                                                


Tuesday, February 6, 2018

Check and Replace Air Filter

Welcome back,

Today I'm going to show you how to check and replace your air filter. It's important to check it every 4-6 months depending on how much driving you do. It's a good idea to replace it if it's gunked up. Every time you accelerate there is a valve the opens up to draw in air, if the filter is clogged then it won't draw the right amount of air (or any if all?).


Pop the hood


I circled my airbox in red. (To get full access to it one should remove the air-dam in front of the airbox, but it's very cold out at the time of the picture and in an effort to speed this along, I was able to get at the filter without removing the air-dam.) Start by removing the clips on top of the airbox (pictured below).


It will open up like a pistachio shell...


You can see I'm starting to pull half of the airbox away, you're going to need enough room to get your hand in there so gently keep pulling. If you're encountering resistance it may be clipped to the body of the car, in that case locate the clip or bolt and loosen it.


Reach in and pull the filter out.


In this case the filter is still good. My filter is approximately four months old. You might be asking, what does a bad filter looks like? I've pictured one below


Related image


Replace the air filter and reverse your steps to button everything back up.


Friday, January 26, 2018

How to check tire pressure

Welcome back,               
As I mentioned in the previous post I cannot assume my audience knows everything I know, therefore we'll start with some basics. Now that winter is upon us, you might notice your tires seem flatter than usual. This is because of the dropping temperatures which causes the air inside to become dense thus lowering the pressure inside the tire.


There are two places you can check that will provide accurate information: the driver-side door jam of your vehicle.


And the owners manual for your vehicle, which is hopefully in your glove-box. You can check online for this information, however I would save that for a last resort.


If you were paying attention to the illustrations, you'll notice that there is more information in the owners manual than on the door jam. As indicated by the chart in the manual, you'll notice that as the temperature goes down, the recommended tire pressure goes up. Lets check the tire pressure.


Use a tire pressure gauge to check the pressure by placing the nozzle of the gauge up to the head of the valve stem. Make sure they're lined up and press the gauge gently yet firmly onto the valve stem. You'll hear some air seep out, press firmly to create a seal between the gauge and the stem. If you have a good seal, air should not continue to pour out. It may take a few tries if this is your first time, if you need to, reset the gauge by pushing the pressure indicator back into the gauge and try again.


In this case, my front left tire pressure is at 33psi. To top it off one will need a pneumatic air compressor. Just plug it in, let it charge up and fill your tire to the correct pressure. In my case I'm going to hold off on topping it off for just 2psi difference. At what level would I fill it you ask? I'll fill it at a 5psi difference. Don't forget to check the other 3 tires.


I hope you learned something today and thanks for tuning in!

Sunday, January 21, 2018

About Me and This Blog

Subaru and Those Who DIY


        Hello everyone! My name is David. When I was 16 I took it upon myself to learn about cars after being ripped off by a mechanic. I had a 1996 Crysler Sebring convertible, it was nice for my first car.. I guess. I had a lot of fun times in it like driving in a blizzard with the top down. Cute girls driving past, laughing and I laughed in turn. Anyway, this car had issues. Sometimes when I would come to a stop sign or red light, it would stall out once I pressed on the gas. I took it to a local mechanic and was ripped off more than once.. Trick me once shame on you, trick twice shame on me. I told myself it would never happen again. If it’s feasible to do it myself, I’m going to at least try. I’ve owned 10 vehicles since I was 16 years old and five of them were manual. I like to drive manuals because I feel like I have more control over the vehicle. 

           I don’t mean to brag, but I’ve preformed some difficult repairs on some of my cars. I had a v8 1998 Chevy Camaro and the oil pump quit out on me. I was only 18 at the time, literally sitting on the ground inside the engine bay wrenching on this sucker. I had a 1999 Jeep Wrangler and the power steering pump was leaking because the 36 inch tires were putting too much stress on it. I read online that a pump from a 1998 Durango would be a significant upgrade. This was a difficult job because of the room that I was given to work with. 

          I currently drive a Subaru Legacy and to say that I love my Subaru would be an understatement. This is my second Subaru, my first was a 2009 WRX. The biggest job I’ve ever undertaken was a transmission swap which took place on the Legacy. Let me tell you, transmissions are heavy so have a trans-jack handy. Having the right tool for the job is crucial. One can improvise but not without risk (damaging what your working on, the tools, or maybe hurting yourself in the process.) This blog will guide you with DIY jobs on your Subaru. You may be able to take some information from this blog and apply it to your own vehicle and experience. To be clear, I'm not a paid mechanic nor did I go to school for this. As you can see I've been working on cars for a number of years and gained some experience along the way. 

          The Legacy below has a ton of mods but to sum up the major ones: STi motor, transmission and differential. This car was originally fitted for a 5-speed and the 6-speed transmission I wanted to upgrade to was meant for a shorter car. So in order to make it compatible, a Spec.b driveshaft, rear axles and master/slave cylinders were used. (Spec.b is to the Legacy as SS is to a Chevy vehicle). If you have a question don’t be afraid to post it or shoot me a pm. Turning wrenches and busting knuckles is what we do, happy wrenching!
No automatic alt text available.